

Before heading in for a smog check, your vehicle's EVAP (Evaporative Emission Control) system must function as intended. The EVAP plays an essential role in trapping fuel vapors before they escape into the environment—without it working correctly, your car could fail the test!
Resetting monitors and following specific steps may make a difference; here, we outline how you can recognize when your system needs resetting, perform a drive cycle, and check on readiness.
Understanding the Evaporative Emission Control System

Let's start at the core: the Evaporative Emission Control (EVAP) system. Consider it like your car's way of keeping harmful fuel vapors from polluting the atmosphere when filling your tank.
When they build up, this system captures them before sending them back into your engine - especially important when getting ready for a smog check - failing which could mean failing the test! If your EVAP system isn't functioning optimally, your chances could be disqualified!
Signs Your EVAP System Needs Resetting
Staying aware of the signs your EVAP system needs resetting is vital to keeping your vehicle healthy. One telltale indicator is the Check Engine Light (CEL), which illuminates when its computer detects an issue related to the EVAP system. Ignoring this warning can cause more problems; don't dismiss this alert!
Fuel economy drops are an obvious indicator that something may be amiss with your EVAP system, as any increased fill-ups or faster tank emptying could indicate this issue. Faulty systems may allow too much-vaporized fuel to escape, which wastes fuel while negatively impacting overall engine performance.
Likewise, suppose your vehicle recently failed an emissions test. In that case, this can indicate that something is off and likely lies with its EVAP system.
Designed to minimize harmful vapor releases from burning fuel sources such as combustion engines and combustion products, its malfunction will lead to higher emissions levels, which will cause it to fail the test and disqualify,y it for registration.
Finally, you may notice strange odors resembling fuel escaping from the system instead of being contained. If this occurs, it's essential to investigate further, as it could indicate an emergency leak that requires immediate attention.
Recognizing early warning signs can help you address potential EVAP system issues before they escalate into more significant problems, keeping your vehicle in top shape.
Also read: Can You Drive with an EVAP Leak? Symptoms, Meaning, Risks, and Fix Cost
Common Trouble Codes: Why Is the CEL On? Which Code Does It Usually Correspond To?
| EVAP Trouble Code (DTC) | Meaning | Potential Issue |
|---|---|---|
| P0440 | Evaporative Emission Control System Malfunction | General system malfunction, size of leak or flow issue not specified. |
| P0442 | Evaporative Emission Control System Leak Detected (Small Leak) | Often a loose gas cap, cracked charcoal canister, or small hose leak. |
| P0455 | Evaporative Emission Control System Leak Detected (Large Leak) | Highly likely a loose gas cap or a failed purge/vent valve. |
| P0456 | Evaporative Emission Control System Leak Detected (Very Small Leak) | A tiny leak that is often harder to diagnose than P0442. |
| P0496 | Evaporative Emission System High Purge Flow | The purge valve is stuck open, causing excessive fuel vapor flow into the intake manifold. |
| P0497 | Evaporative Emission Control System Low Purge Flow | A faulty purge or vent valve resulting in insufficient flow. |
| P1456 | Evaporative Emission Control System Leak Check Module (Honda Specific) | Specific to Honda/Acura, often indicates a fault with the Leak Detection Pump (LDP) or related circuit. |
| P1CEA | Leak Detection Pump (LDP) Performance | Typically related to the Leak Detection Pump itself or its circuit malfunction. |
Troubleshooting Common EVAP Problems: DIY Inspection Tips
Before attempting a full drive cycle or spending money on complex repairs, it's wise to perform a few simple, inexpensive inspections. Often, the cause of an EVAP trouble code is surprisingly minor.
1. The Simplest Check: The Gas Cap
The most frequent culprit behind an EVAP leak code (such as P0455 or P0442) is a faulty or loosely secured gas cap. This is the most common and cheapest fix for an EVAP leak.

figure:Inspect Your Gas Cap: A First Step to Clearing Your EVAP Code
2. Professional Diagnosis: Smoke Testing
If the gas cap is ruled out, the leak is likely deeper within the system (hoses, valves, or the canister). The professional way to locate the exact source of a leak is by using a smoke machine:
-
Process: A technician injects non-toxic smoke into the EVAP system. The smoke then escapes through any cracks or openings in the lines, canister, or valves, making the leak visible.
-
Tool Requirement: For comprehensive leak detection, professional-grade automotive smoke machines are essential. Products like the Foxwell ST203 and SD201 offer reliable, high-pressure smoke generation, making them highly effective for tracking down even the tiniest leaks associated with codes like P0442 or P0456, and ensuring the system is fully sealed before testing.
3. Common Component Replacements
If your OBD-II scanner points to specific flow issues or component failures, the following parts are commonly replaced:
-
EVAP Purge Valve: This valve controls the flow of fuel vapors from the charcoal canister to the engine. If it sticks open (often leading to codes like P0496), it causes a vacuum leak and high purge flow, requiring replacement.
-
EVAP Canister: This component contains activated charcoal to absorb fuel vapors. If it becomes saturated with liquid fuel (due to overfilling the gas tank), it can fail and must be replaced to restore proper system function.
-
EVAP Vent Valve: This valve allows fresh air into the system during the cleaning (purge) cycle. If it fails to open or close correctly, it can cause various flow and pressure codes.
Step-by-Step Guide to Resetting EVAP System Monitors
Resetting your EVAP monitors doesn't have to be complex - follow these simple steps.
First, ensure that any necessary repairs for your EVAP system have been completed to avoid further issues. This step can prevent further difficulties from developing.
Once completed, disconnect and leave off the negative battery terminal for approximately 15 minutes to reset your car's computer system. This should provide enough time for it to reset.
After waiting a moment, reconnect the battery terminal securely.
Start up your engine and allow it to idle for several minutes to prepare its computer system.
Finally, a drive cycle should be conducted under various driving conditions so the monitors can self-check and reset themselves.

Fastest Way to Get EVAP Monitor Ready
If you need to complete the EVAP monitor quickly before an emissions inspection, follow these proven steps. Many vehicles respond faster when the correct conditions are met.
- Keep fuel level between 1/4 and 3/4 tank
- Start the engine after sitting overnight
- Idle for 2–3 minutes after cold start
- Drive steadily at 45–65 mph for 10–15 minutes
- Allow gentle coast-down without hard braking
- Repeat over the next 1–2 days if needed
- Use an OBD2 scanner to confirm readiness
EVAP is often the last monitor to become ready, so one drive cycle may not be enough.
Why EVAP Monitor Stays Incomplete
If the EVAP monitor still shows incomplete after driving, one of these conditions may be preventing the self-test:
- Fuel tank too full or too low
- Loose or faulty gas cap
- Battery recently disconnected
- Only short city trips
- Cold weather outside test range
- Pending EVAP leak code
- Faulty purge valve or vent valve
If the monitor does not reset after several proper trips, scan for pending trouble codes.
Perform a Drive Cycle: How to Prepare for a Smog Check
To prepare for a smog inspection, a proper drive cycle is critical to ensure your vehicle meets all standards and is roadworthy.
A drive cycle consists of conditions that enable onboard diagnostics of your vehicle's systems (including its EVAP system ) to self-check themselves; here's how it should be carried out efficiently.
Step 1: Cold Start
To kick start your drive cycle, begin with a cold start by starting your car when the engine is completely cold, ideally after sitting overnight. Allow it to idle for five minutes without acceleration before touching the accelerator; this warm-up period allows your engine components to stabilize and prepare it for testing.
Step 2: Steady Driving
Once the engine is warm, the second step in this procedure involves steady driving at 30-40 mph for at least five to ten minutes on an uninterrupted route like highways or long, straight roads. This steady driving will enable monitors to accurately evaluate how well EVAP systems and other related components function over time.
Step 3: Accelerating and Decelerating
In addition to maintaining a constant speed, it's also essential to include periods of acceleration and deceleration.
Gradually accelerate to approximately 55 miles per hour before letting off the gas and allowing your car to coast downhill to a stop without sudden stops or rapid deceleration; smooth transitions will allow the monitors to collect enough data to complete their checks effectively.
Step 4: Stop and Idle
Once the acceleration/deceleration phase is complete, bring your vehicle to a complete halt and allow it to idle for a few minutes in neutral.
This allows the system to conduct additional checks while the engine temperature stabilizes; pay particular attention during this idle period to see if any anomalies arise; any irregularities could indicate undiagnosed issues with its performance.
Step 5: Repetition
For optimal results, repeating the drive cycle two or three times should allow monitors to complete self-checks and ensure all systems are operating appropriately before smog inspection.
By carefully performing this drive cycle, you are helping your vehicle's onboard diagnostics gather the necessary data to ensure that its EVAP system and other components are operating within their required parameters. This increases your odds of passing the smog check with flying colors.
Cold Weather, City Driving, and Highway Time Tips
Driving conditions can greatly affect EVAP monitor completion.
| Condition | Typical Effect |
|---|---|
| Cold Weather | May delay testing if temperature is too low |
| Short City Driving | Engine may not stay warm long enough |
| Highway Driving | Often helps complete monitor faster |
| Heavy Traffic | Frequent braking may interrupt test cycle |
For best results, combine city driving with at least 10–15 minutes of steady highway cruising.
GM vs Ford vs Toyota EVAP Drive Cycle Differences
Different manufacturers may require slightly different EVAP monitor conditions.
| Brand | Common Requirements |
|---|---|
| GM | Fuel 15%–85%, overnight cold soak, highway cruise, coast-down |
| Ford | Warm engine, steady speed driving, idle period |
| Toyota | Cold start, smooth acceleration, long cruise, deceleration |
Always follow the exact drive cycle for your model if available.
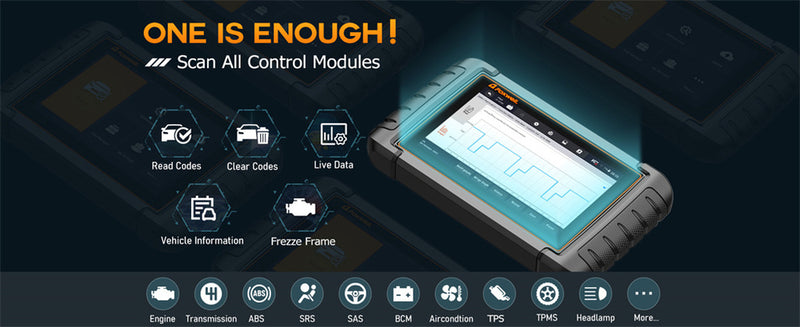
An OBD-II Scanner Can Be a Useful Tool for Monitoring Vehicle Status
OBD2 scanners can be valuable tools in keeping tabs on your car's health, such as the Foxwell NT809TS scanner. Here are some tips for using it effectively:
- Comprehensive Diagnostics: The Foxwell NT809TS provides in-depth diagnostics for all major systems, including the EVAP system, to detect issues quickly.
- User-Friendly Interface: This scanner's intuitive design and clear display make navigating its different functions and data straightforward.
- Real-Time Data: With real-time engine data monitoring, you can assess how well your vehicle is performing at any given moment.
- Code Reading and Clearing: Reading and clearing trouble codes is easy, enabling you to address issues promptly while resetting the check engine light.
- Advanced Features: The scanner includes advanced features like live data streaming and graphing for greater insight into your vehicle's performance.
- Compatibility: This device is compatible with many vehicles, making it an indispensable asset to any car owner.
Frequent inspection of your vehicle with the Foxwell NT809TS can save time and energy while helping maintain its health effectively.
Common Pitfalls to Consider When Resetting EVAP Monitors
While resetting your EVAP monitors may seem simple, there are some potential pitfalls you must be wary of when doing it yourself. Here are a few mistakes you should avoid doing when setting them back up:
One major mistake can be to put off necessary repairs before starting over again. Ignoring existing issues will only lead to repeated incidents of problems being experienced repeatedly.
Not completing an entire drive cycle may result in incomplete monitor readiness and lower your chances of passing smog inspection.
Misinterpreting data from your OBD-II scanner may lead to unnecessary repairs or overlooked issues. By being mindful of these potential pitfalls during the resetting process, you can more efficiently achieve successful outcomes and maximize its success.
Large truck platforms may take longer than sedans to complete EVAP readiness.
GM Silverado / Chevy / GMC EVAP Drive Cycle Tips
Many GM trucks and SUVs such as Silverado, Sierra, Tahoe, Yukon, Chevy, and GMC models may need stricter conditions.
- Fuel tank between 1/4 and 3/4
- Vehicle cooled for 8+ hours
- Drive at 55 mph for 10–20 minutes
- Allow throttle-release coast-down
- Repeat over 1–3 cold starts if needed
Large truck platforms may take longer than sedans to complete EVAP readiness.
Can You Pass Emissions With EVAP Monitor Not Ready?
Possibly yes. Some states allow one incomplete readiness monitor depending on vehicle year and inspection program.
However, some locations require the EVAP monitor to be ready before passing inspection.Always verify local rules before visiting the test station.
California, Texas, and New York Emissions Rules (General Guide)
| State | General Readiness Rule |
|---|---|
| California | Often stricter emissions requirements |
| Texas | OBD2 readiness required in many counties |
| New York | Allowance may vary by model year |
Check the latest official regulations for your area before inspection.
Conclusion
Resetting the EVAP system monitors is integral to getting ready for a smog test. By understanding how it operates and being aware when its reset is needed, as well as following our steps outlined here, you can help ensure your car meets emissions standards. Remember to use tools like OBD-II scanners and perform drive cycles regularly to maintain compliance; taking proactive measures with your car will make the entire smog check process go more smoothly—Happy driving!
FAQs
How do I get my EVAP monitor to complete?
To get your EVAP monitor to complete, you need to perform a proper drive cycle. This involves a cold start, steady driving at 30-40 mph, and smooth deceleration. Repeat the cycle a few times to allow the system to reset and complete its checks.
How long does it take to reset an EVAP sensor?
Resetting an EVAP sensor usually takes one complete drive cycle, which can last anywhere from 20 minutes to an hour, depending on driving conditions. After resetting, ensure the vehicle goes through multiple driving phases (idle, acceleration, and deceleration).
Why is my EVAP monitor not ready?
Your EVAP monitor may not be ready due to incomplete drive cycles, unresolved system issues, or faulty components like a gas cap or sensor. Make sure any repairs are completed and perform the full drive cycle to help the monitor reset.
How long does a complete EVAP monitor drive cycle typically take?
The time required varies significantly by vehicle make and model, but a proper, complete EVAP drive cycle usually takes between 20 minutes to over an hour of mixed driving, often requiring several phases of cold start, steady cruising, and idling to complete the entire self-test process.
Can I pass a smog test if my EVAP monitor is the only one "Not Ready"?
In many states (especially those using the OBD-II test), you are allowed a certain number of "Not Ready" monitors, typically one or two, depending on the model year of your vehicle. The EVAP monitor is often the slowest to run, and in many jurisdictions, passing with only the EVAP monitor incomplete is acceptable. Always check your local DMV or testing station regulations.
Besides EVAP, what are the most common emission monitors that fail to become ready?
The Catalyst Monitor and the Oxygen Sensor (O2) Monitor are also frequently "Not Ready" after a battery disconnect. These require specific driving conditions, often involving sustained highway speeds, to run their diagnostic tests and complete the readiness check.
What Does EVAP System MON INC Mean?
EVAP System MON INC means the EVAP readiness monitor is incomplete. The engine computer has not finished testing the evaporative emissions system yet.This often happens after clearing codes, disconnecting the battery, or driving short distances only.Once the proper drive cycle is completed, the monitor should change to Ready.
Leave a comment
This site is protected by hCaptcha and the hCaptcha Privacy Policy and Terms of Service apply.